Thursday, March 10, 2011

Master the Basics Day 5: Applying Natural-Looking Eyeliner

Applying Natural-Looking Eyeliner


  •  For a natural-looking eyeliner and the illusion of lusher, fuller lashes, use a dark brown eye pencil and carefully press a series of dots between your lashes following your lash line.

  •   For the sophisticated look, draw a smooth fine line alone the top lashes.


  • To create the dramatic look, draw a line inside your lash line (as close to the lashes as possible), then along the top of the lash line.


Wednesday, March 9, 2011

Hair Stylist to Watch: Hair By Nicole

Nikki is a hairstylist located in Phoenix, Az.

She loves what she does, which is make people feel great about themselves by cutting/coloring/styling their hair. She studied cosmetology at Empire Beauty School in Chandler, Az and is now working at Distinctive Salon and Spa in Phoenix as a Hair Stylist. Take a look at some photos of her previous clients here and also on her Facebook page Hair. By. Nicole, and if you like what you see, don't hesitate to make an appointment!
  602.955.9300

Distinctive Salon and Spa
located in the Town & Country Plaza on Camelback & 20th.
  
     2025 E. Camelback Rd.
     Phoenix, Az 85016
 
Before     &      After


Model: 
Zeida Jimenez

Photographer:


Before    &     After 


Model: 
Priti Ravani

Photographer:


Nikki in action: Haircut and style on site photoshoot


Master the Basics Day 4: Dramatic Elegant Eyes

Creating Elegant, Dramatic Eyes
 

1. To create a gorgeous nighttime look, use light, medium and dark eyeshadow shades in graduated tones. Apply the dark shade along your lash line, the medium shade on the crease, and a light shade up to the eyebrow bone but not beyond. Soften and blend any hard edges so one color seems to melt into the next.
 

2. To open up your eyes so that they appear livelier, place a dot of a light shadow in the inner corner of each eye.
 

3. For a sexy, smoky effect, trace the upper and lower lashes with a dark shadow then smudge with a blending brush. To optimize the look, this can also be done over eyeliner.

Tuesday, March 8, 2011

Master the Basics Day 3: Sophisticated Look

Creating the Sophisticated Look
 

1. Apply a light eyeshadow over your entire eyelid from lash line to eyebrow bone, but not beyond.
 

2. Define the crease of your eyelid using a medium or dark shade. The deeper the shade, the more dramatic look.
 

3. To open up your eyes so that they appear livelier, place a dot of a light shade in the inner corner of each eye.

When choosing an eyeshadow shade, keep in mind that a pastel shade will look softer while a darker shade will appear more dramatic when applied.

Monday, March 7, 2011

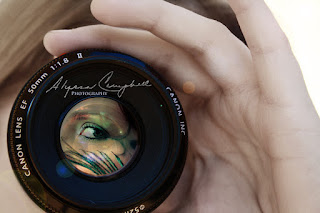
Photographer to Watch: Alyssa Campbell Photography


Alyssa is a portrait, senior, couple, engagement, pet, family and child photographer that specializes in lifestyle portraits that will bring out your individual personality and emotions.


Alyssa takes time to get to know each and every one of her clients to ensure that each session is unique and fun!


View Alyssa Campbell Photography's Website!


Sunday, March 6, 2011

Master the Basics Day 2: Hide Imperfections

  
  Women are always concerned about covering up the imperfections on their face when they do makeup. We are all guilty of it who wouldn't be. There are many ways to achieve this and not cake on makeup causing your skin to have more problems. I first need to remind all you makeup geeks that washing your face and moisturizing is very very very important. Your face is your canvas so keep it healthy and there wont be many if any imperfections so cover up. The main tool in hiding imperfections is
concealer. It is more dense than foundation, allowing fuller coverage of trouble spots and red areas. It can be used over foundation or on it own, and has greater staying power. It is very dense and you don't not need to over apply on an a troubled area. Remember, a little goes a long way!

1. Since the skin under your eyes is more transparent, it tends to look dark, especially at the inner corner near the bridge of the nose. Even if we get enough sleep it is easy to have dark circles. To even out the tone, concealer is a must. Using liquid concealer, gently pat over dark under-eye circles (don't sweep it across the entire area), then blend with your ring finger. Then you can apply foundation like normal. DON'T FORGET TO BLEND! This is important because concealer is one shade lighter than your skin so you want it to blend in not stand out.


2. To cover trouble spots and imperfections, apply a thicker cream concealer onto the blemish or flaw. Then lightly press with a makeup sponge. You should wait for it to dry and then use your foundation powder all over your face for a finished look.

Tips:
  • Choose the shade of your concealer carefully. When testing out shades, pick one that matches your skin tone or one shade lighter. It helps to use a mirror outdoors to see how shades look on your skin in natural light.


  • Prepare your skin with a light SPF moisturizer or any moisturizer before applying concealer for a smoother application.

Master the Basics Day 1: All Day Flawless Finish

Getting an all-day flawless finish
Every woman wants a long lasting flawless finish throughout the day and guess what you can! All you need is the basics, liquid foundation, foundation powder, concealer, and blending brushes/or powder puff.A light even dusting of loose powder sets foundation and concealer, giving your face a velvety, more natural finish. It also provides smooth blending for any eye makeup. It is a common mistake but women put foundation on before eye makeup. You want to apply all eye shadows before foundation this way if powder falls under your eyes on any where on your face you can clean it up easier. It is inevitable! Powder will fall in other places on your face, be prepared. 


1. Use your liquid foundation all over your face after you have cleaned up any excess makeup that has fallen.

2.Dip a puff or powder brush in loose powder. Shake off excess to avoid uneven distribution, then apply powder over entire face and neck. This will set the foundation and give you a more even look.
 

3. To maintain a flawless finish throughout the day, apply pressed powder using a sponge or clean powder brush.
  
Tips: 
  • Face powder can be used alone, over foundation or over your moisturizer for a natural, sheer, no-shine look.

  •  For the closest color match, choose a powder shade that is 3 shades lighter than your foundation.

  •  If you are over the age of 30, avoid powdering under the eyes as it can make fine lines and wrinkles appear more obvious.

  • Facial oil-blotting sheets help to remove excess oil and shine without disturbing your makeup. Carry them with you everywhere you go! These are an easy find and not expensive at all.

Thursday, March 3, 2011

Being Published in Merj Magazine!

Along with Cathy Lee Photography and Hair.By.Nicole I am being featured in the first ever issue of MERJ! MERJ is a publication that features the collaboration of artists from differing disciplines who create "exceptional interdisciplinary, collaborative projects." The "Call to Duty" editorial, with model Briana Gonzalez, was selected by MERJ's editorial board and will be showcased in both the event flyer (seen above) as well as have its own gallery display at the Launch Party on April 2!!
 

Great Article on Flawless Foundation

This is from Sonia Kashuk one of my favorite makeup artists! She has amazing products and is so talented!

Types of Foundation

Sonia Kashuk Real Beauty
Enlarge Image

Sonia Kashuk
Most of us keep our foundation as close as our ATM card. And just like crisp cash, we tend to "spend" too much of it. That's the most common problem women make -- putting foundation all over their face when that's very rarely needed. When you get the right shade, and you know how and where to use it, you'll find you need very little.
But first -- which form do you choose? There are sticks, liquids, creams, and powders. If you have normal skin, you're fine with anything. Dry skin is best with a cream or liquid -- these glide easily over the skin. Oily skin is best with an oil-free liquid but a powder foundation's even better.
I almost always advocate the sheerest coverage possible. I like to see real skin through any foundation. It has life in it -- freckles and little idiosyncrasies are what make you...you. Liquid is the sheerest form of foundation. Powder and dual finish powder are less sheer. And cream can be the heaviest, most opaque of all.
Once you choose what to use, you can still control the amount of coverage. With a cream or liquid, use a damp sponge, foundation brush, or -- my favorite tool for applying foundation -- fingertips. I typically squirt some from my favorite pump formula onto the back of my hand and dab on from there. This warms it somewhat, and I don't have to deal with a dispenser while I apply.
To build more coverage, apply in thin layers, using a gentle patting motion so you never pull on the skin. You can also go super sheer by blending cream or liquid foundations with a bit of moisturizer. With a pressed powder foundation, you can apply wet or dry with a sponge. Wet, you get more coverage. Dry will be more sheer.
It's also good to think ahead to what makeup you plan to apply over your foundation. Cream products are compatible with cream foundations. Powder colors work best over powder foundations.
So -- cream blush on top of a dual finish foundation? Bad idea. The powder will "grab" the cream blush and you won't be able to blend it into place. Powder blush on top of a liquid or cream foundation? Also a bad idea -- unless you brush loose powder over the foundation to create a compatible surface for your powder blush. Similarly, cream eye shadows should go over a cream foundation; powder shadows over powder.
A final word about finish: If you've used a cream foundation, your face will be dewy. If you want creams to go matte, add a final dusting of loose powder.

What Color Is Best?

Foundation should always match your skin tone. Don't try to fake a porcelain face when you aren't that fair. Likewise, don't try to fake a two week vacation in St. Bart's if you aren't that dark. Anything other than your real color will look like a mask.
When you put foundation on, it should disappear on the skin -- then you know it's the right shade. Another plus to a perfect match is that you won't have to wear it over your entire face, which is important because (I can't say this enough) most women don't need foundation all over.
Color Tips
  • Always test foundation shades on your face, not on your hand. Put a bit on. Blend it out. If you no longer see it, it's perfect.
  • Don't shy away from shades that look yellowish in their packaging. On your face, they'll look great. Foundations with a yellow tint neutralize pink tones on your face. (This same tip holds true for concealers and powders.) You might think if you have pinkish skin, you need pink in your foundation. Not so. What you're after is a neutral tone, with no pinks or blues.
  • If your skin color is between two shades, go with the darker shade. A too-light foundation is more noticeable -- it will appear to be sitting on the surface of the skin. If you can't get a perfect color match, make sure to blend over the jawline and onto the neck. But with all the choices out there, I doubt you'll have a problem.
  • Don't be surprised if you need to switch shades with the seasons. If you go in the sun (with a smart sunscreen, of course) your foundation should change to match your tawnier skin tone. Most women need one shade for winter, another for summer.